Showing posts with label bind it all. Show all posts

Friday, August 23, 2013

Back to School with Cut it Up! {Custom Teacher Plan Book}

Hi Crafters,

It's back to school time over at Cut it Up! This challenge is to create an altered notebook.  This is one of my favorite projects so far! I suppose I should adore it since I will be using it almost every day at work.

We have TWO wonderful sponsors for this challenge. Take a look at their websites that are packed full of wonderful products.  Be sure to link up your project at Cut it Up for a chance to win.


Now onto the nitty gritty details...


I covered chipboard on both sides for the cover.  The flourish is from Teresa Collin's Elegant cartridge and the font is Opposites Attract.

I created a 1 page style weekly planner.  I only have 1 prep so I was able to divide the page into sections: Day of the week, Classwork, Homework, and Meetings.  The headers have a space for the dates and the unit.  There is a space at the bottom for notes. One Prep Excel Planning Page click the link for the excel file.  I set it up with 2 tabs adjusting the margins to accommodate the binding for a front page and a back page.

Did you notice that Michael's gift card? That's my snazzy DIY page marker. I used an old Michael's gift card and punched holes with my bind it all.  I then took a pair of sharp scissors and cut small slits into each hole and cut off a small piece of the plastic to allow the rings to slide more easily into the holes. I have it positioned here not using the very top hole so it stick up to create an easy to find tab.

This section has a parent communication log.  It is very easy to keep up with emails through the virtual paper trail.  I am not very good with keeping up with phone calls.  I'm hoping this will keep me accountable for this aspect next year.  The columns are labeled: Date, Student, Parent, Number, Reason, Resolution. Parent Communication Log Excel Page 


I also included some blank white paper at the end. I jazzed it up a bit with a monogram.  This will come in handy at the meetings that I attend throughout the year. Lastly I cut the top off an envelope and added that to the end before the back cover.   I used my bind it all to punch the holes bind everything together.  

This is one of those projects to NOT wait until the day before you head back to the classroom to work on! I spent a couple of work sessions preparing my documents and putting everything together.  I hope this inspires you to get your year off to a great start!

Thanks for stopping by,


Sunday, February 17, 2013

{disney} preparations

Hi crafters,

We had my niece's birthday party today.  She and her cousins are headed to Disney in a few months, this made crafty gift giving quite easy.

I made this count down with my bind it all.  The numbers are the cricut craft room font and the letters are from Lyrical Letters.

 I cut the white cardstock at around 2 inches and covered the chipboard with red paper.

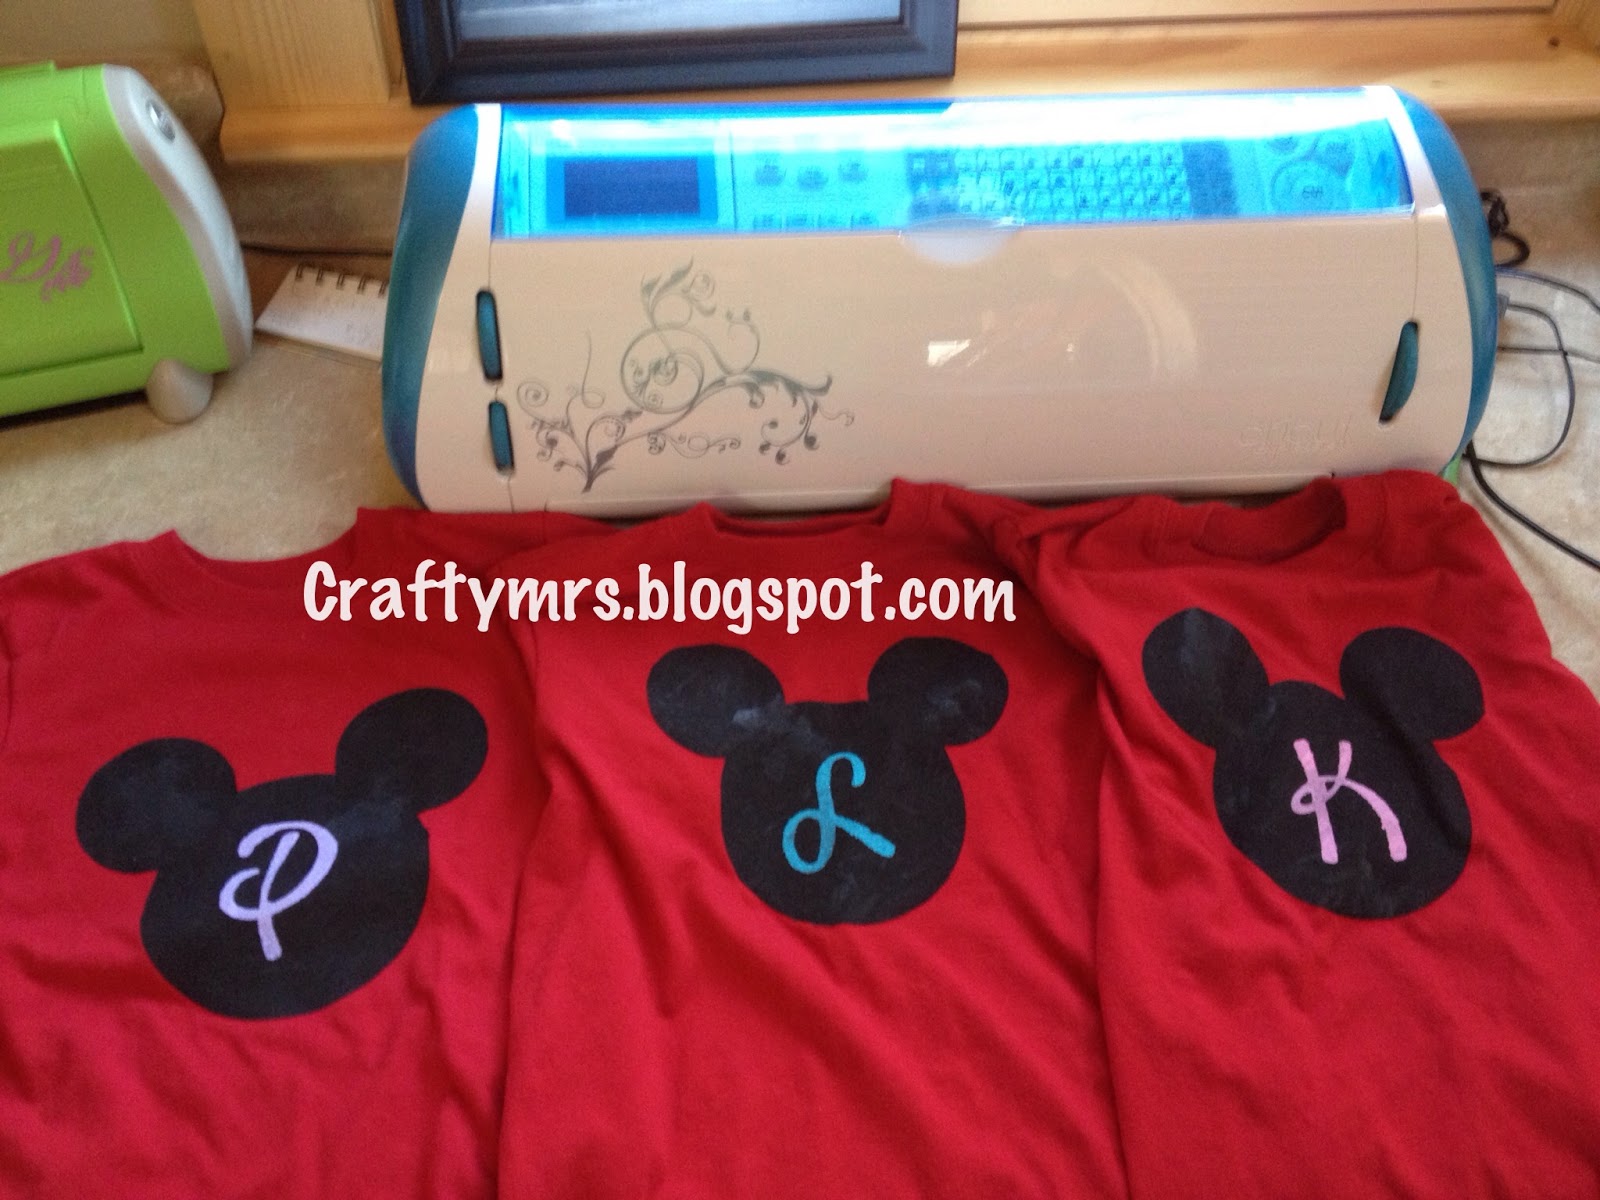
 I got matching shirts and used freezer paper to make the Micky heads.  I didn't have the Disney cartridge with it so I just used the head from a cart I didn't have and grabbed three circles and sized/welded them over top of it before deleting the original.

I created these autograph books for them to take to the park.  I covered chipboard with paper and used white computer paper inside for the pages.

The crowns are from Paper Doll Dress Up.  The Micky head was created using the same method as above.

I used fun paper inside the covers and did the reverse for the back covers.


Happy Crafting,

Saturday, November 17, 2012

:Alligator Baby Shower Full Review:

Hi Crafters,
Here's an update from the shower this past weekend.  We had a great time! It's always lovely to see the co-worker fam outside of school.

We did the food on the island.  A few of the highlights were a cheese ball, BLT bites, and spinach/artichoke dip.

I made little alligator tents to label the food. Here's a snap shot of the dessert bar.  This alligator is the same one from the invites and came from Create a Critter.

We had cupcakes, lemon cake, s'more dippers, and brownies.  I made the chandelier decorations with Mini-monograms and New Arrival.

The diaper cake used mini monograms, new arrival, and opposites attract for the accents.

The banner pieces came from Teresa Collin's Chic and Scary.  I custom cut the white strips with an exacto knife.  The font is from Opposites attract and outlined with the markers.
I used blue tulle as the string to hold everything together.

 Here's the whole shot of her gift.  Burp cloths, name canvas, and memory book (below). "Drew" is cut out with a shadow and regular font from Designer Calendar.  The canvas measures 8x23.
The mom-to-be is also a crafter so instead of making her a scrapbook I came up with this memory record book.  Each page has a monthly calendar and a space for notes on the opposite page

I used my bind it all to bind everything together.  She seemed to really enjoy the shower.  Baby Drew got a lot of great goodies!  Can't wait to meet him!

Happy Crafting,


Wednesday, December 28, 2011

2012 Calendar

Hi Crafters,

I made a calendar for my mom for 2011.  When her November birthday rolled around she planted the bug that she hopped she'd be getting a new calendar.  I had already started on her 60th birthday gift, I just didn't have time to put a new one together.  Luckily Christmas was right around the corner!  I used my bind it all with 3/4 inch black rings.  The month titles came from Designer Calendar.  The font on the front and silhouettes are from A Child's Year.


 The cat is from Teresa Collin's Chic and Spooky cartridge.


She was so excited to open this up on Christmas.  I hope you are ready for 2012!

Happy Crafting,


Friday, July 15, 2011

My Pink Stamper Design Team

Hi Crafters,

I have had several good friends get engaged this summer.  This project is one that I've been thinking about for a few weeks but needed a kick in the pants to get it done.  My Pink Stamper is hosting a design team call, so I took the plunge and decided to apply.  The challenge was to use the colors, orange, brown, green, turquoise,  a color of your choosing (white for me), and your favorite cricut cartridge (Storybook is what I chose).   I would LOVE to be on the My Pink Stamper Design Team!  Robyn does such a great job making the cricut a tool that everyone can learn to use!

I made a wedding squash book/organizer using my bind it all.

Here are the specs
Front and Back Outside Covers (all the measurement units are in inches)
Chipboard for the covers- 9x11.25
Orange DCWV- 9x5 1/4 embossed with swiss dots and Frills boarder set
Turquoise Print DCWV Flower Power- 9x4
Brown 9x3 1/2
ATG tape on the VERY edge of the paper is the adhesive I've found to work the best.

Front Details
Storybook Cricut Cartridge
C- Fancy/Corner  3 inches
L and M- cut at 1.5 inches
Welded on gypsy and embossed with textile folder
Marquee white cardstock (page 66 in handbook) cut at 4 inches


Ribbon
2 pieces 9 inches.  I used a match to singe the edges to keep from fraying.
Attach on inside of cover BEFORE attaching white paper.  I used several pieces of double sided tape under and over the ribbon.

Inside cover
White- 9x4
Pocket
Green- 8 1/2x11 measure 1 3/4 inch in on both sides and cut diagonally from bottom corner.  I put ATG tape on the folded sections leaving the inside edge open because that edge will be sealed with the binding rings.


Dividers
8x11
Tabs 3 1/2x 2 folded in half on the 3 1/2 length.  Use ATG tape to glue then fold over each side of the divider.

Inside Spreadsheets
Spreadsheets include
  • To do list
  • Gift records
  • Address Section
  • Contacts
  • Blank Paper
Would you like a copy of the spreadsheets I created? Wedding Squashbook Spreadsheets Click Here Please feel free to share and change as needed.


Thinking about true squashbook fashion I included blank white paper and envelopes for extras, such as business cards.

Here is the back cover.

If you made it this far thanks for checking everything out!  All of the pictures are clickable for a larger view.

Mrs. C To Be--I'm sorry if you are seeing this here the first time.  I hope you like it and can't wait to give it to you with a few other goodies!

Happy Crafting,

Sunday, June 13, 2010

Let the Summer Festivities Begin

Hi Crafters,

This will be my last weekend crafting with only my create machine.  CricutMachine.com was having a great sale on the holiday blue expression, they had it for $170!  I can't wait to get her in.  She should arrive sometime this week.
Meanwhile we had our last day with the students on Friday which means my summer crafting schedule is officially kicked off!  I started it out with a bang and did a variety of projects.  This included breaking in my bind-it-all that my husband got me for my birthday.
I need to practice more needless to say.  I did learn a lot during this first round as I think one does with everything the first time you try it.  I made this little notebook to keep in my purse.  I always find I need a quick piece of paper.  This will do the trick.  The paisley cut is from Stretch Your Imagination and the scalloped circle is from Mini Monograms.


I made this for my brother in law who will be starting his freshman year of college this fall.  I really wanted to go all out with the vinyl and customize a dry erase board and more containers for him, but was afraid it would be too girly.  I toned it down with this and figured he could keep it in a drawer if he hated it.

I made this card for a friend who I know will have a hard week this week.  It's hard to tell but I used some glitter on the bird.  I ran it through the xyron machine and some of the glue webbed around the delicate swirls so when I applied the glitter it had an interesting effect.


This card is cut from Camp Out.  The inside will say "We hope you have a beary special Father's Day".  This is for my father-in-law.  I can't believe Father's Day is next weekend!
This is my last project for the day (I told you I was busy today)!  I apologize for the poor picture quality but it is difficult photographing glass and this is a round dish which made it an even bigger challenge.  I used contact paper to cut out the name then using the negative of the paper placed it on the glass.  I used the armor etch glass etching cream you can find at your local craft store.  I left the etching solution on for about 30 minutes and it left a great etching.  I did check on it and re-apply it to places that looked thin through out the 30 minutes.

More projects next week!

Happy Crafting,